Installing Arch Linux on an Inspiron 5547
After four years I am finally replacing my old laptop. It served its purpose well, considering it was a base model with no frills. The new laptop arrived with Windows 8.1 installed, which I was somewhat less than thrilled about. The first order of business, then, would be to install Arch Linux.

Along the way I encountered a few issues, mostly in dealing with the laptop's sound device, an HDA Intel PCH card, chipset ALC3234 and setting up the hardware buttons to adjust the display brightness. This is also my first Arch install to use UEFI, but that turned out to be much easier than I expected.
Installing Arch
Surprisingly, the factory wireless card works out-of-the-box with linux, as the drivers are included in the kernel. The initial Arch install is much easier as a result. There are several guides available on the internet, and several walkthroughs on Youtube to get a basic system set up. I recommend following those to get a basic system working as the details here mostly focus on configuration. The one exception is installing the boot loader and some basic partitioning that relates to UEFI.
UEFI Setup
GRUB2 works very well with UEFI. If you are familiar with setting up GRUB for BIOS-based machines, installing it on UEFI-based machines will be almost the same. I opted for simplicity with this install and deleted the partitions that contained Windows 8.1 and its recovery software, then created a single large ext4 partition in the empty space left over. The only partition I left intact was the UEFI ESP partition. This will become /boot later on. ESP stands for EFI System Partition. It is a special FAT32 formatted partition that stores the bootloaders for machines running EFI/UEFI. During setup, mount it to /boot and install 'grub' and 'efibootmgr'. Next, run 'grub-install' to place a grub EFI binary in the ESP. The format is:
grub-install --target=x86_64-efi --efi-directory=<path to ESP partition, in my case /boot> --bootloader-id=<name to show up in EFI menu> --recheck
It's that simple (as long as you have SecureBoot disabled). More information can be found in the Arch wiki page for GRUB.
Backlight Brightness Keys
I used xbindkeys to handle key press detection and binding. It can be used to detect nearly any keypress on a system and has configurable actions. I set it to run a script when it detected backlight brightness keys being pressed. My .xbindkeysrc looks like:
"/home/hsb/.backlight.sh -inc"
        XF86MonBrightnessUp

"/home/hsb/.backlight.sh -dec"
        XF86MonBrightnessDown
And .backlight.sh referenced above is:
#!/usr/bin/bash

if [ $1 == "-inc" ]
        then
                xbacklight -inc 10
fi

if [ $1 == "-dec" ]
        then
                CURRENT=`xbacklight -get`

                if [ ${CURRENT%.*} -le 12 ]
                        then
                                xbacklight -set 1
                        else
                                xbacklight -dec 10
                fi
fi
This script prevents the backlight from being set to 0% brightness, which turns it completely off and makes the screen unusable.
ALSA ALC3234 Setup
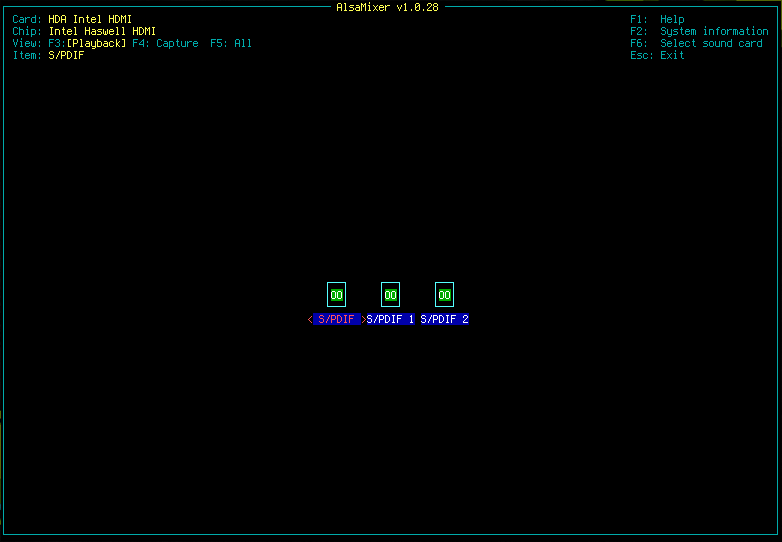
The primary issue with the sound card in the Inspiron 5547 (based on the ALC3234) is that the HDMI outputs will be selected as the default outputs by ALSA. To get ALSA to play sound to the correct outputs you will need to set the default card to the regular sound output part of the Intel HDA card. First, run 'alsamixer':

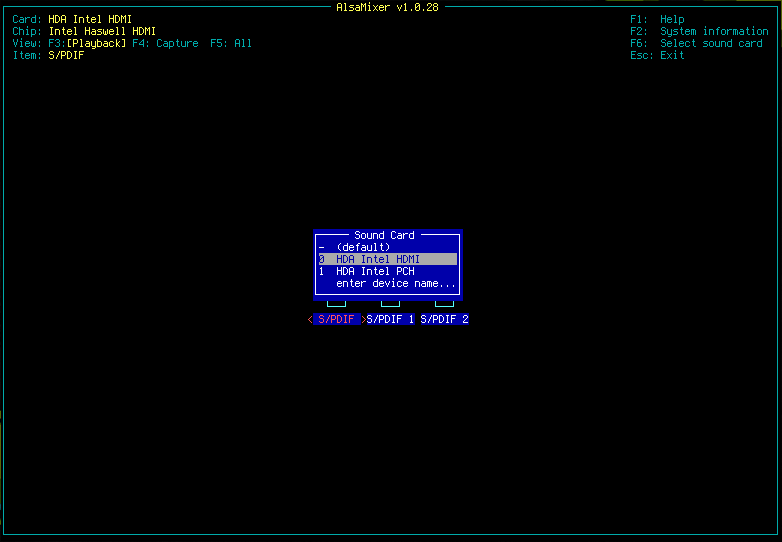
Press F6 and change to the "HDA Intel PCH" card:

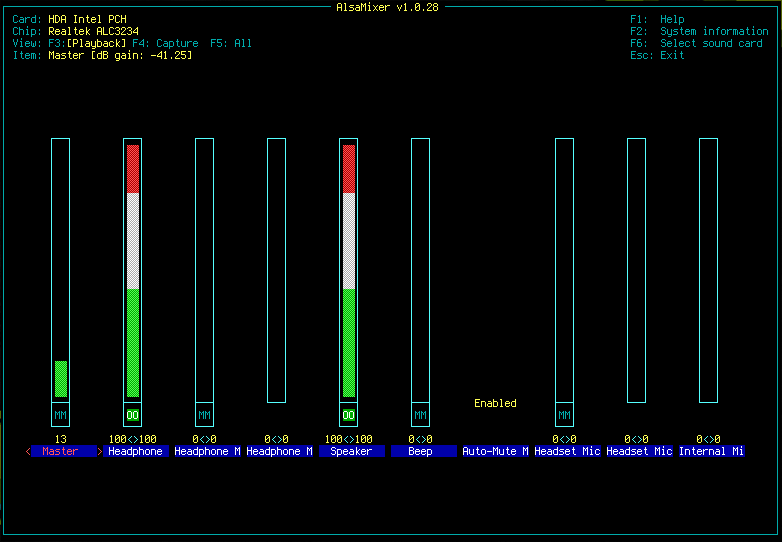
Unmute the channels (select them and press the 'M' key) to mirror these settings. You can ignore the volume levels themselves:

You will need to create an /etc/asound.conf file and fill it with this:
kpcm.!default {
	type hw
	card 1
}

ctl.!default {
	type hw
	card 1
}

pcm.dmixer {
	type dmix
	ipc_key 1024
	slave {
		pcm "hw:1,0"
		period_time 0
		period_size 1024
		buffer_size 8192
		rate 44100
	}
	bindings {
		0 0
		1 1
	}
}

pcm.dsp0 {
	type plug
	slave.pcm "dmixer"
}

pcm.!default {
	type plug
	slave.pcm "dmixer"
}

ctl.mixer0 {
	type hw
	card 1
}
The "default" section sets the default device to play sound to. The "dmixer" section routes sound to allow multiple sources to play at once and prevents the output from being "stolen" by a single source. The "ctl" section defines what the default action should be when adjusting volume. If you use volumeicon, right click it and select "preferences", then make sure the device is set to "default" and channel set to "Master".